A project’s General settings hold the basics: its name, a short description, what kind of project it is, and a photo.
Open project settings
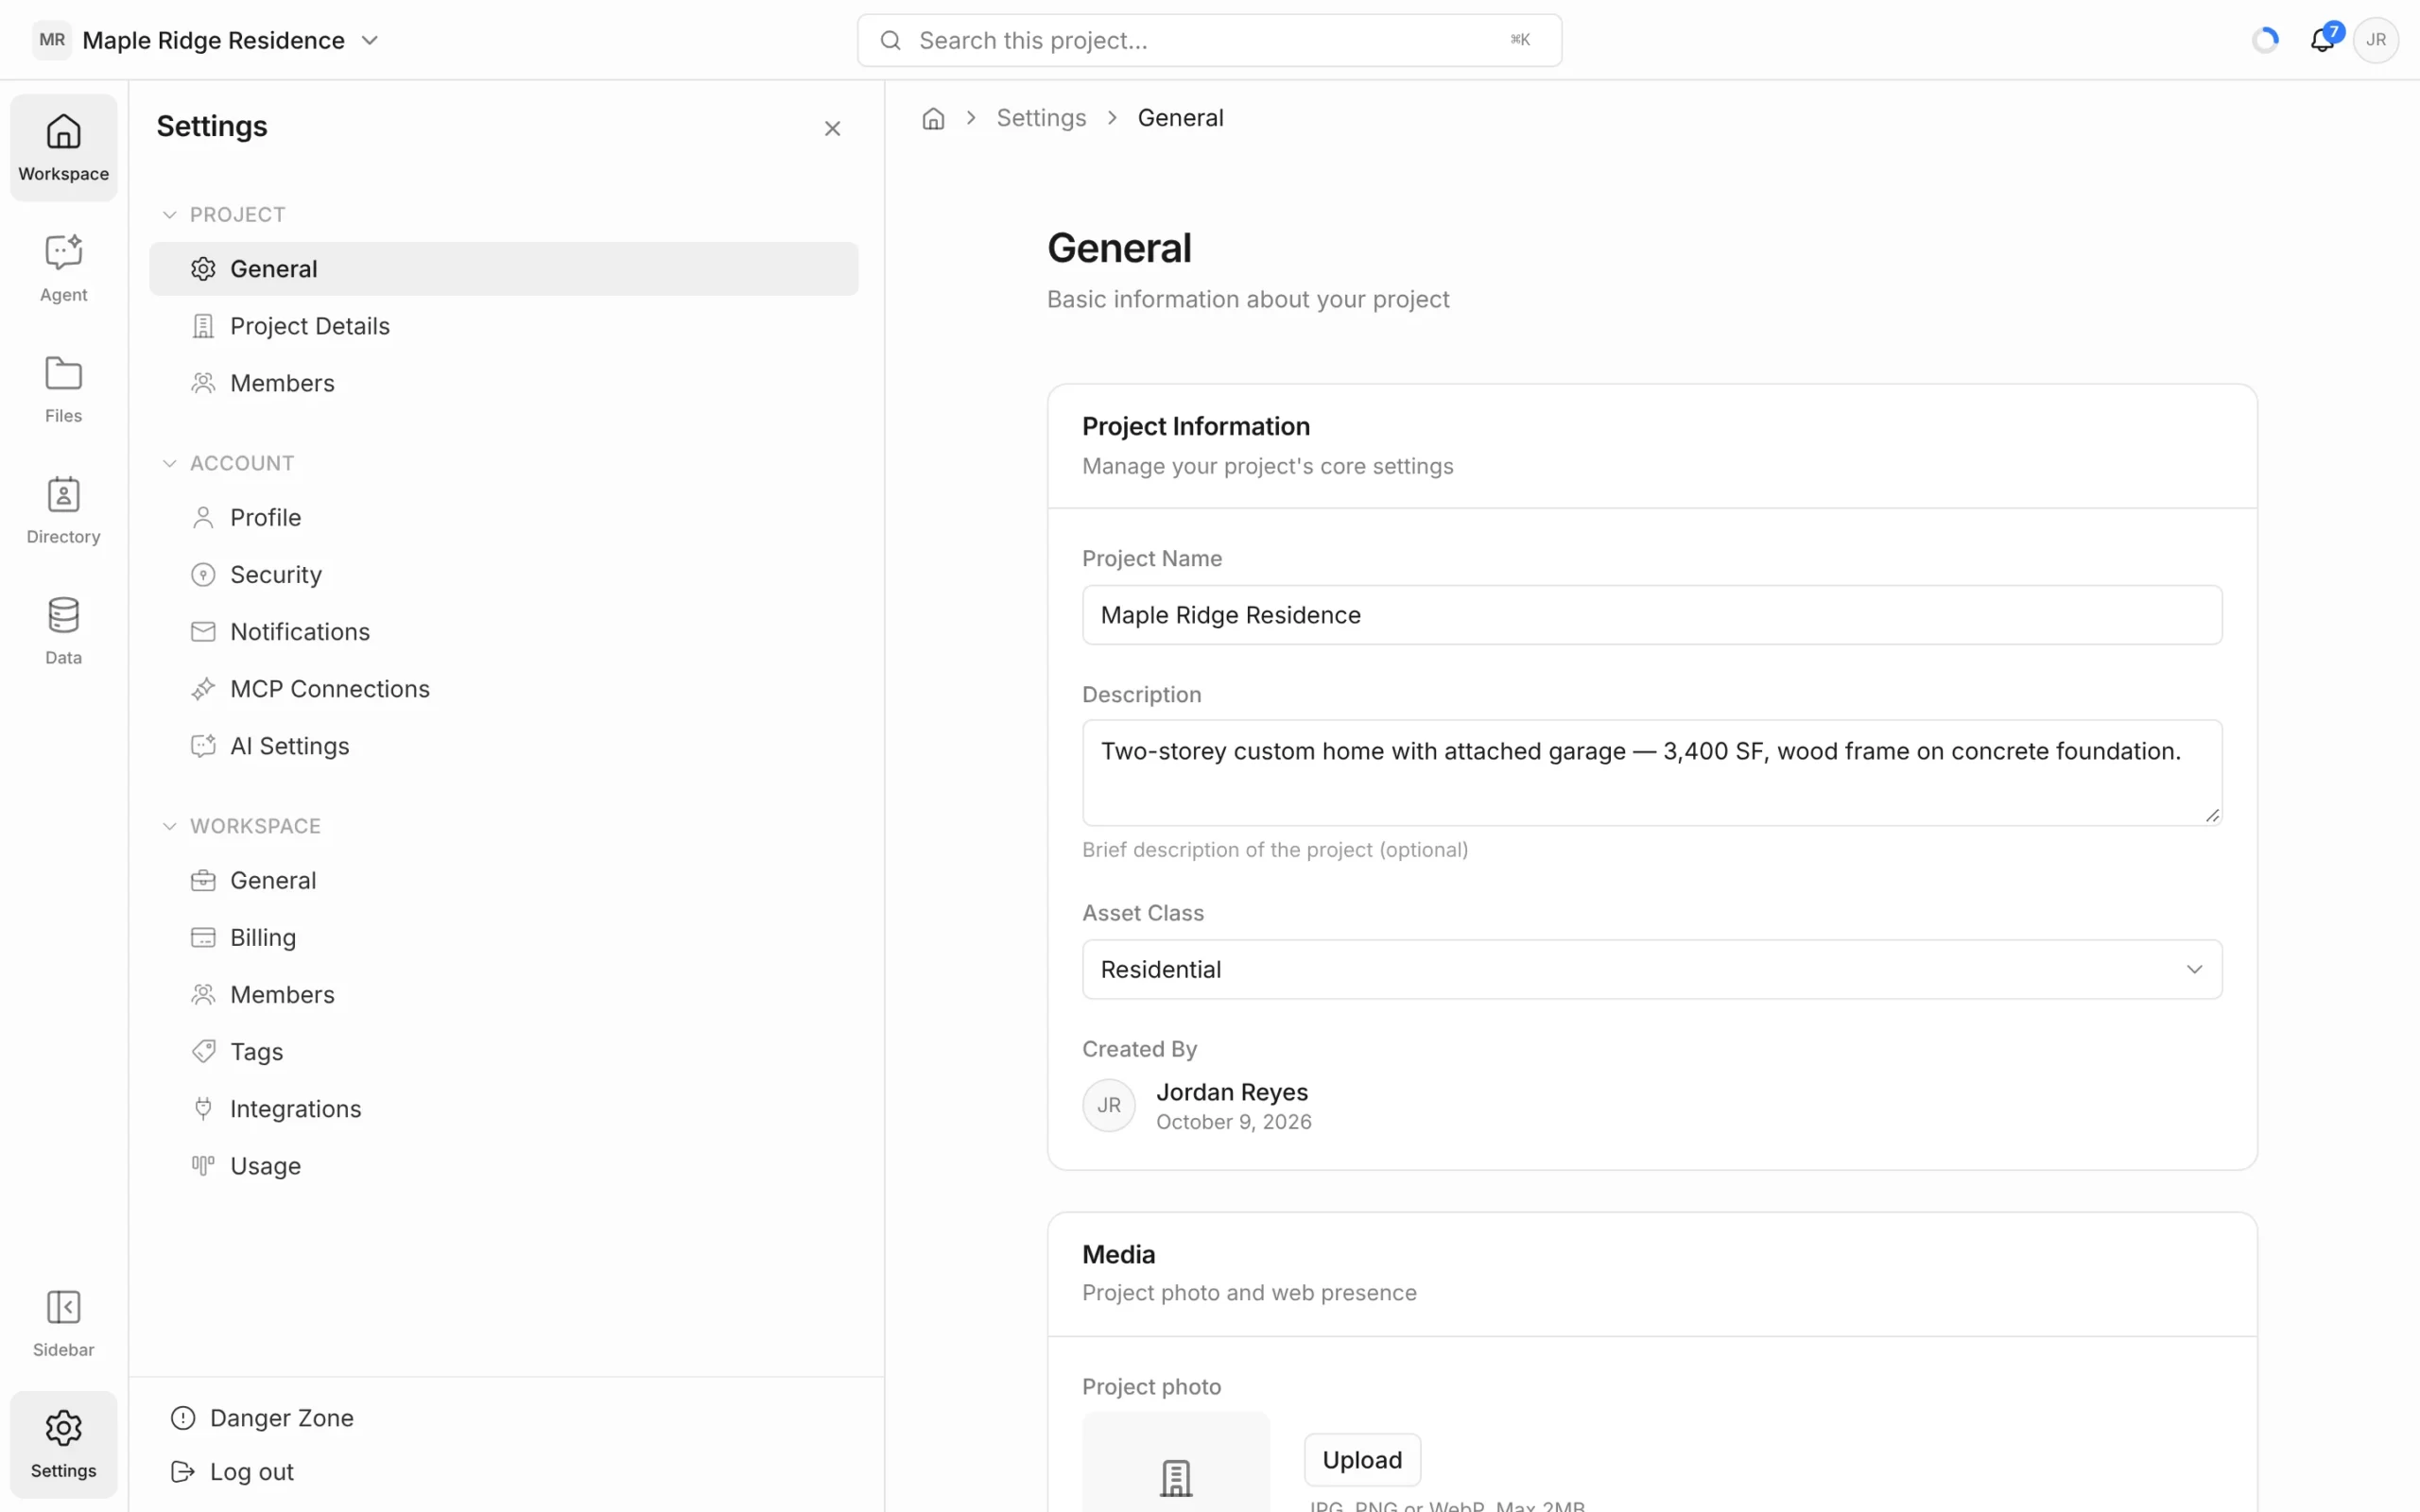
- Inside the project, click Settings at the bottom of the left rail.
- Under Project, click General.
You can also get there from your account menu (click your initials, then Project settings), or from the gear next to a project in the project switcher.
Edit the details
- Change any of these fields:
- Project Name — required.
- Description — optional, up to 1,000 characters. For example: “Two-storey custom home with attached garage — 3,400 SF, wood frame on concrete foundation.”
- Asset Class — Residential, Commercial, Industrial, Institutional, Infrastructure or Other. This is what the Projects page uses when you group by Project type.
- Project Website — optional link to a public website or landing page for the project.
- Click Save Changes.
Created By shows who created the project and when. It can’t be changed.
Change the project photo
- Under Media, click Upload next to Project photo.
- Choose a JPG, PNG or WebP image up to 2 MB.
The photo is used as the project’s picture across the workspace — in the project switcher and on the Projects page.
Who can change settings
Project Owners and Admins can edit these settings. Editors and Viewers can see them but the fields are locked.
Other settings in this panel
- Project Details — address, start and end dates, project value. See Project Details.
- Members — who’s on the project and their roles. See Members, Roles & Sharing.
- Danger Zone (owners only) — archive or delete the project. See Archiving & Deleting Projects.
- The Account and Workspace sections below hold your personal and workspace-wide settings.