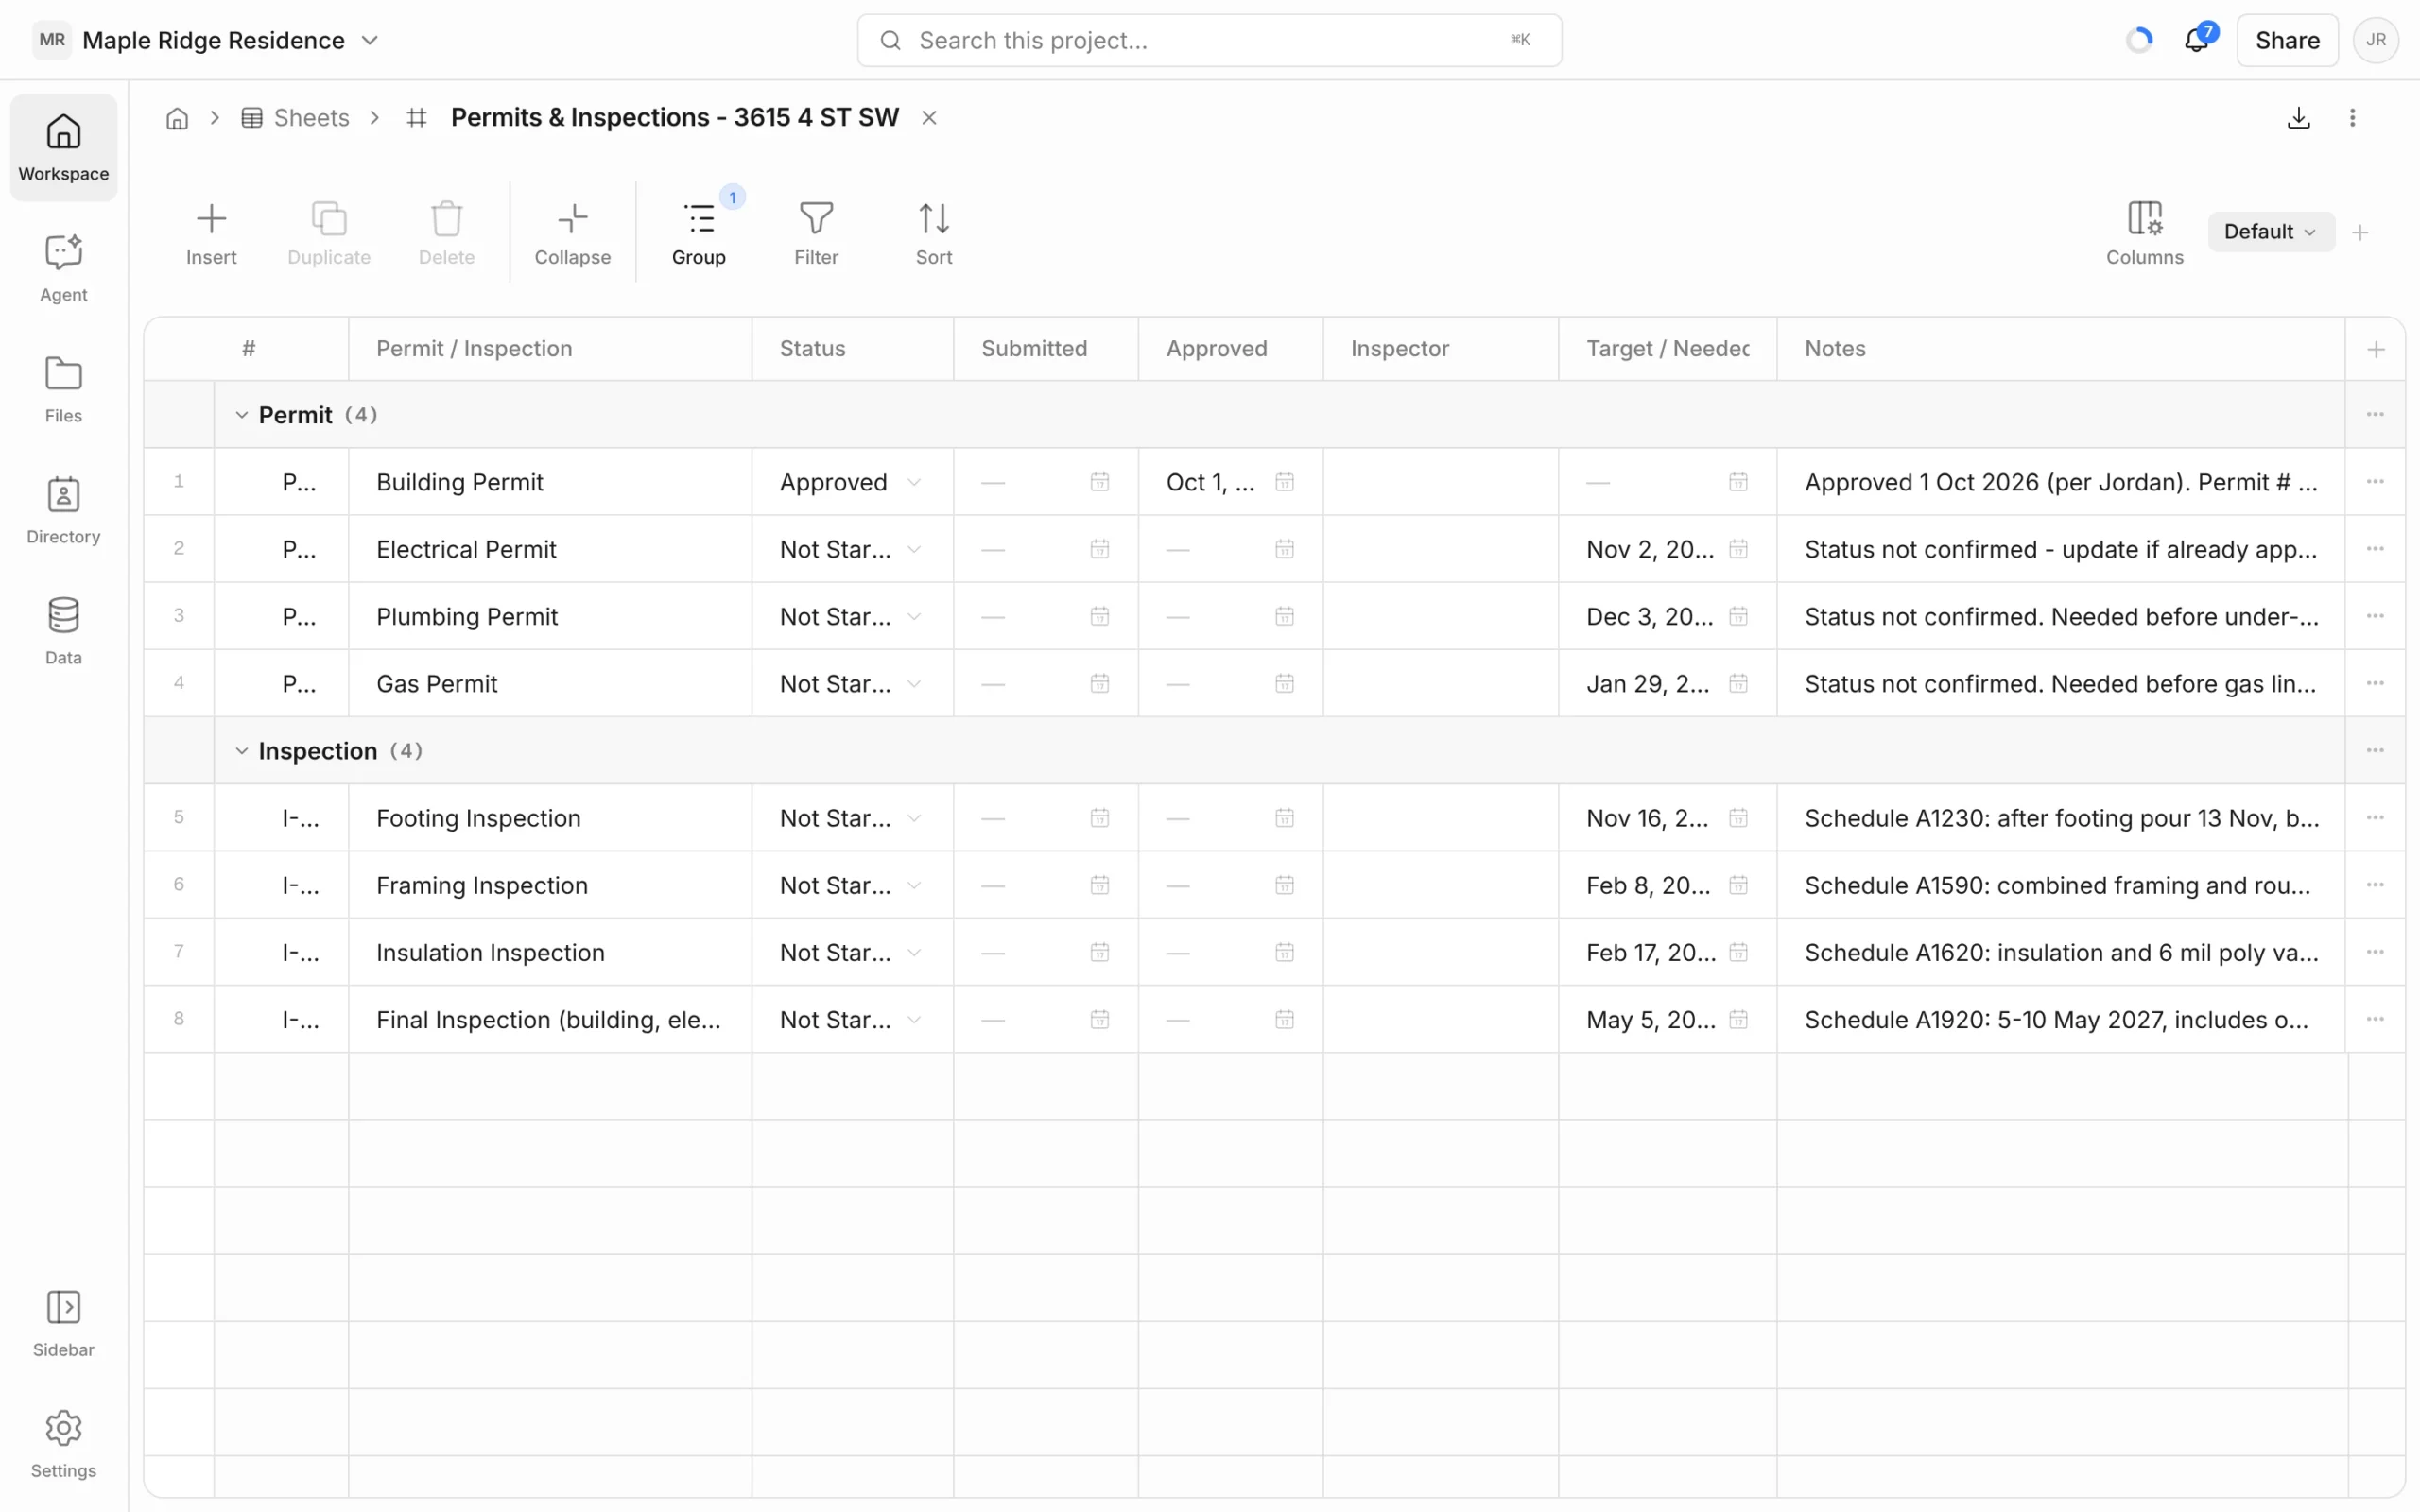
A sheet is a grid for tracking things row by row: permits and inspections, procurement, risks, a punch list. Each column has a type, so dates pick from a calendar, statuses come from a list and totals add themselves up.
Create a sheet
- In the Workspace panel, click + Page.
- Pick Empty sheet, or a sheet template such as Permit Tracker, Risk & Opportunity Register or Punch List.
You can also use + on the Sheets heading, or ask the agent: “Make a sheet that tracks long-lead items with supplier, lead time and required-on-site date.”
Work with rows
- Insert adds a row. Click a cell to edit it; press Enter to save.
- Select rows with the checkbox that appears when you hover a row number, then use Duplicate or Delete in the toolbar.
- The … at the end of a row has Insert above, Insert below, Duplicate and Delete.
- Copy and paste ranges to and from Excel or Google Sheets.
Add and set up columns
- Click + at the right end of the header row to add a column.
- Click the column’s heading to open its menu, then Rename it and choose Type: Text, Number, Currency, Computed, Select, Checkbox, Date, URL, Email, Phone, Person or Notify.
The same heading menu has:
- Edit options — the choices (and colours) for a Select column.
- Add formula / Edit formula — for a Computed column (see below).
- Conditional formatting — colour cells by rule.
- Sort ascending, Sort descending, Group by this column.
- Show total — a total at the foot of Number, Currency and Computed columns.
- Wrap text, Hide in this view and Delete column.
A Notify column holds a person and notifies them when they’re added. Use the bell in the cell to turn notifications off or Send now.
Formulas
On a Computed column, choose Add formula. Build it from other columns (start typing a column name and pick it), numbers and the operators + − * / — for example Quantity × Rate. Functions available: IF, ROUND, ROUNDUP, ROUNDDOWN, MIN, MAX, ABS, SUM, AVG, AND, OR, NOT. The Preview shows the result for a row before you Save. Formulas carry through to Excel exports.
Conditional formatting
Choose Conditional formatting, click Add rule, pick a colour and a condition — contains, is, is not, greater than, less than, is empty, is not empty — then Save. The first rule that matches colours the cell.
Group, filter, sort and views
- Group — group rows by a column, add a Sub-group by, and set a group colour. Collapse / Expand folds all groups.
- Filter — show only rows that match one or more conditions.
- Sort — sort by one or more columns.
- Columns — show or hide columns.
These settings belong to a view. The view tabs sit at the right of the toolbar (Default to start). Click + to add a view, and click the active view’s name to Rename view or Delete view. Views let one sheet serve different people — an open-items view for site, a full view for the office.
Export
Click the download icon (Export) at the top right. Choose Company branding if you want a logo on it, then Excel (.xlsx), PDF (.pdf) or CSV (.csv).