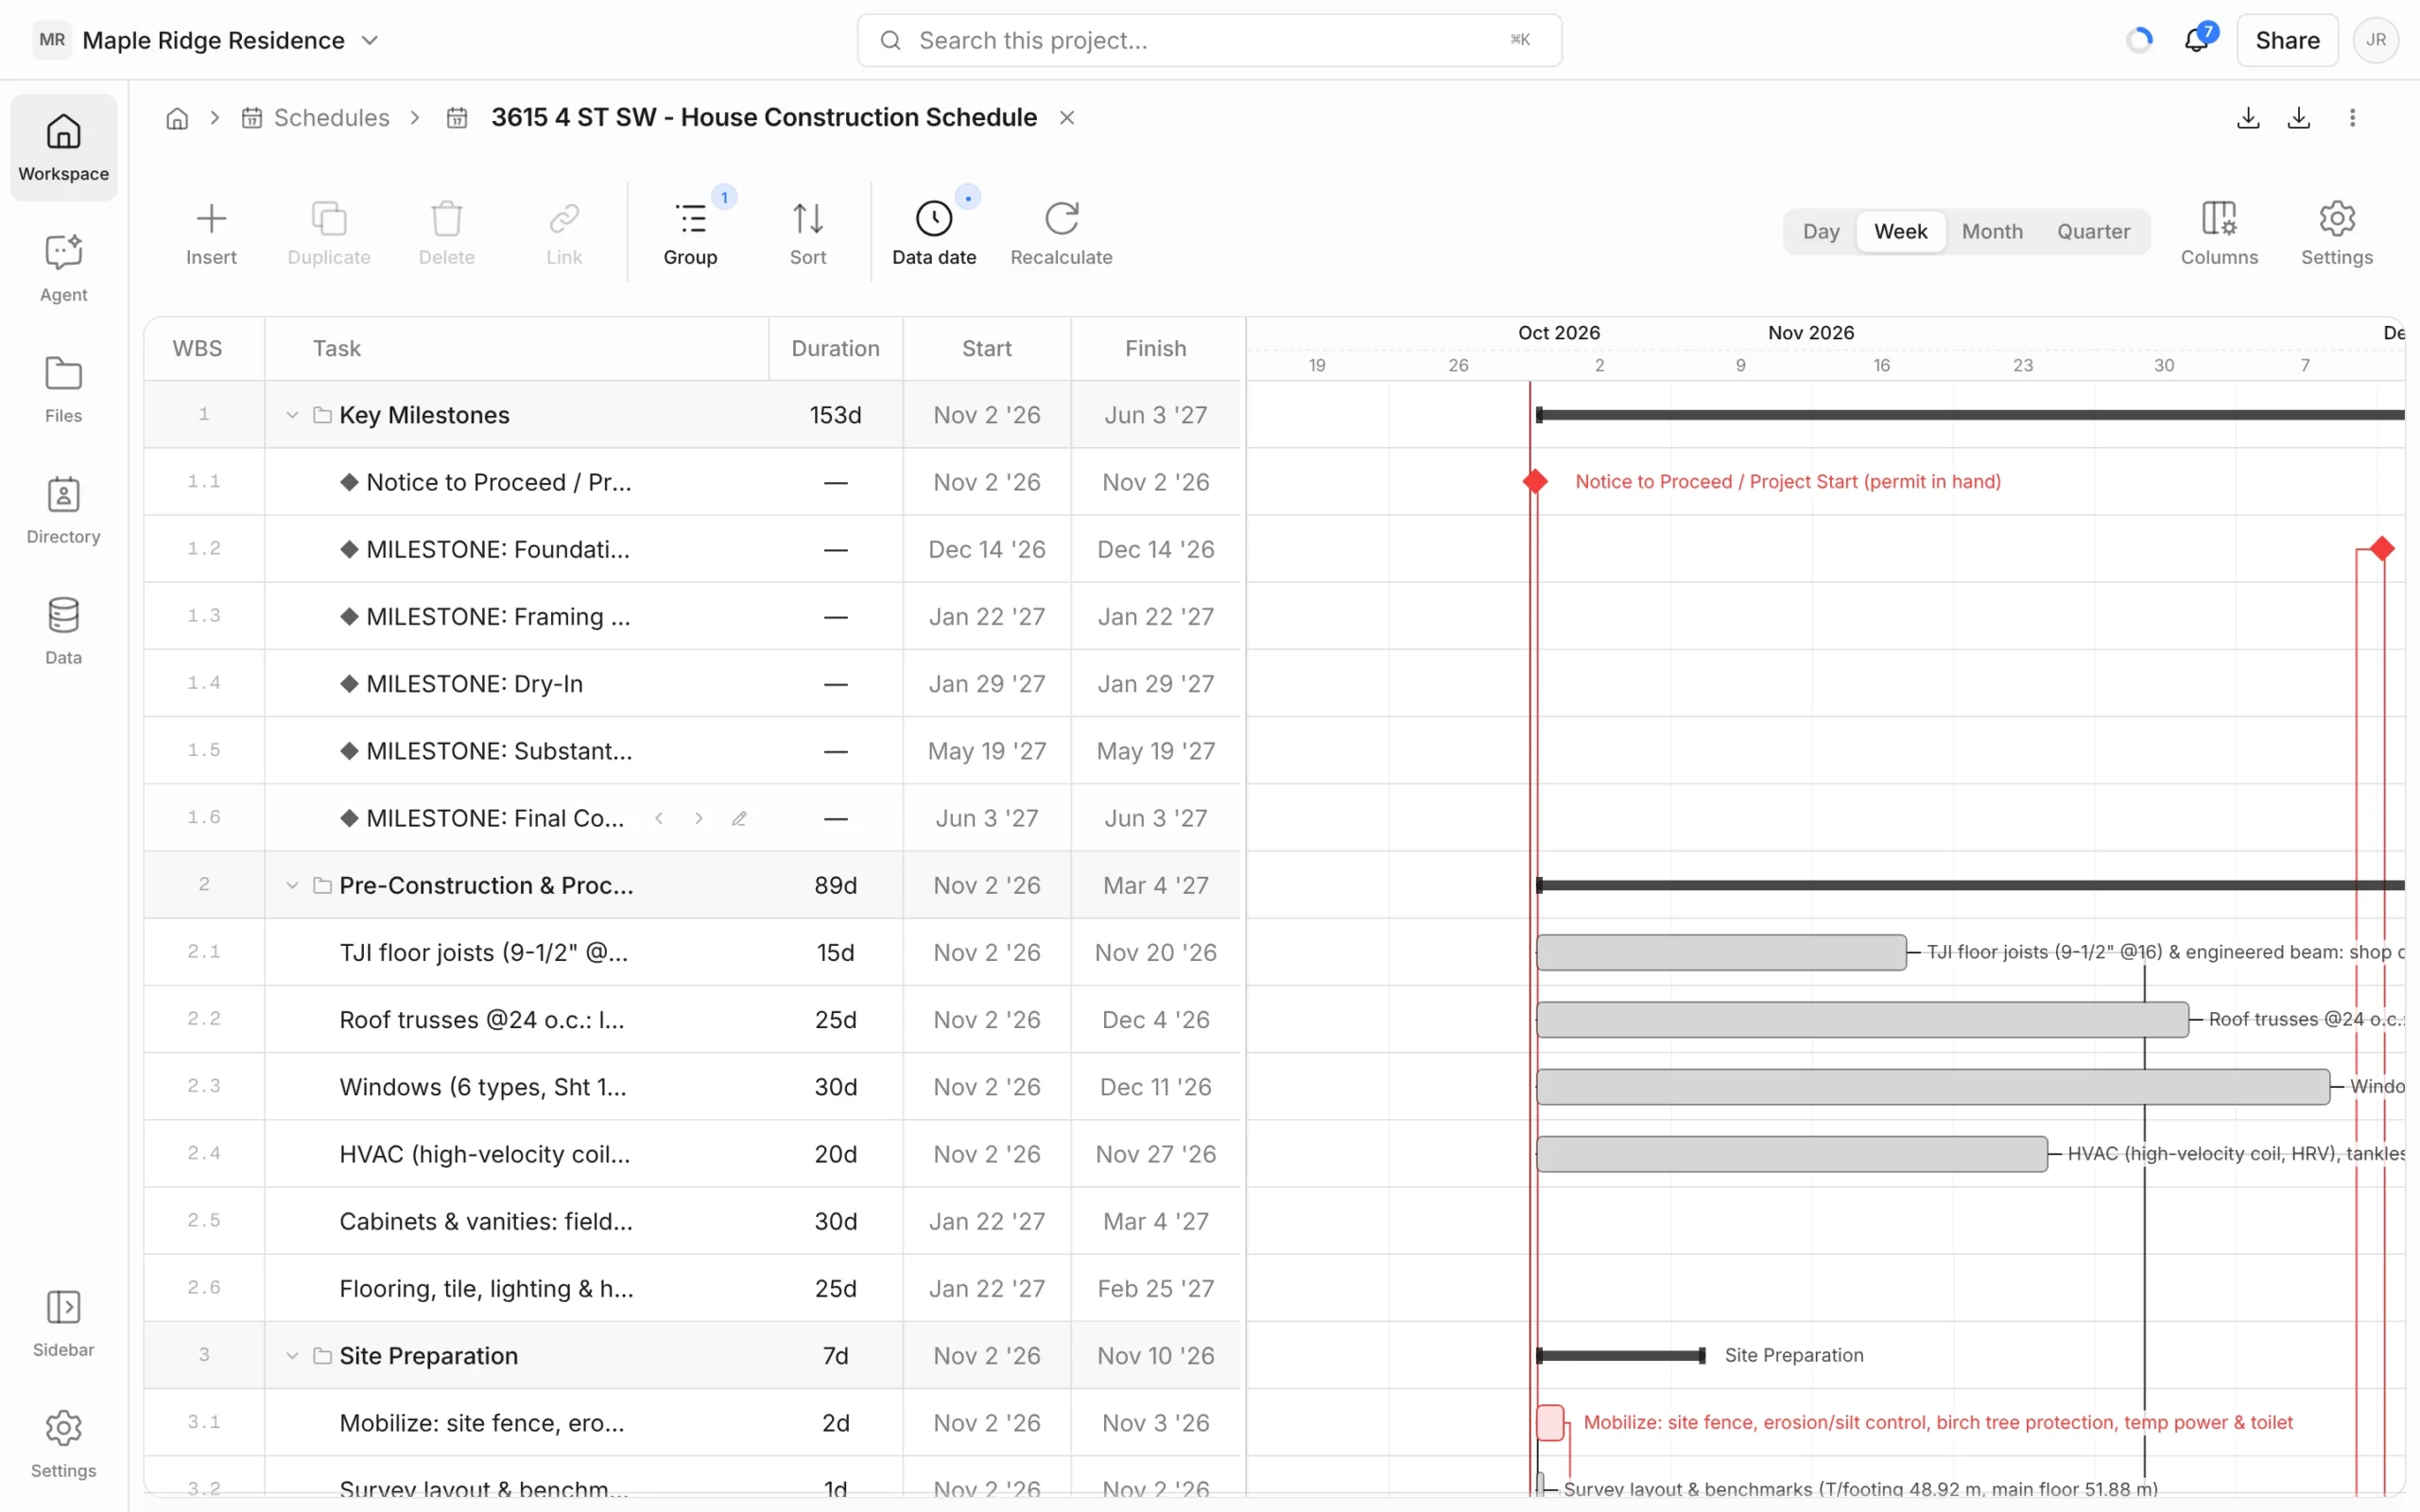
A schedule is a task list and Gantt chart side by side. Link tasks and Framework works out the dates and the critical path for you (CPM); record progress and it reschedules the remaining work from your data date.
Create a schedule
- Click Schedules in the Workspace panel to open the log, then New schedule.
- Pick Blank schedule or a template — Master schedule, Contract milestones, Three-week lookahead, Procurement schedule, Single-family house or Mid-rise residential. Templates start you with a WBS of tasks and links.
You can also click + Page → Empty schedule, or ask the agent: “Build a CPM schedule for this house from permit to occupancy.”
Add and arrange tasks
- Insert adds a task. Type its name and a Duration — 5d for five days, 4h for hours; a plain number means days.
- With a row selected, press Enter for a new task below, Tab to indent it under the task above (making that a summary), and Shift+Tab to outdent.
- Select tasks to Duplicate or Delete them.
- Hover a task name and click the pencil (Edit in drawer) to open the task drawer. Double-click a name to rename it.
In the drawer’s General tab set the Type — Task, Milestone (zero duration, shown as a diamond) or Summary (dates roll up from the tasks under it). Manual start fixes a start date; Early start, Early finish and Total float show what the calculation worked out.
Link tasks
- Select two or more tasks and click Link to chain them finish-to-start in order.
- Or drag from the dot at the end of one bar to another bar.
- In the task drawer’s Relationships tab, set each predecessor and successor’s type — FS, SS, FF or SF — and a Lag (e.g. 2d).
Dates recalculate as you edit. Critical tasks show in red. Drag a bar to move it, or drag its ends to change its duration.
Track progress
- Open a task’s Progress tab and set Status (Not started, In progress, Completed), % complete, Remaining, Actual start and Actual finish.
- Click Data date in the toolbar and set the “as of” date. Anything not yet started is scheduled from that date.
- Click Recalculate to rerun the dates.
Working calendar
Click Settings → Project calendar… to set Hours per day, the Working week and Holidays & date overrides (click Add date for a holiday or a day with different hours). Durations and dates follow this calendar.
Settings also has Relationship display… (show link lines, Highlight critical in red) and Bar labels… (what’s written beside each bar).
View and organise
- Day, Week, Month, Quarter — zoom the Gantt.
- Group — by WBS, Status, Type or Critical path. Sort — by name, duration, dates and more.
- Columns — add ID, Remaining, % and Float to the grid.
- Drag the divider between the grid and the chart to resize them.
Export
Click the Export icon at the top right, choose Company branding if you want it, then PDF (.pdf) or CSV (.csv). The Import icon beside it brings in a Microsoft Planner plan — see Importing Schedules.