If your schedule already lives in another tool, bring it in rather than rebuilding it. There are two ways, depending on what you want to do with it:
- Import a Planner plan into a Framework schedule — the tasks become yours to edit, link and track here.
- Add a P6, Microsoft Project or Planner schedule to the project’s Data tab — a read-only copy that stays in sync with the source, which you and the agent can look through.
Import a Microsoft Planner plan into a schedule
- Open the schedule you want the tasks in (or create one — see Schedules).
- Click the Import icon at the top right, next to Export.
- If you haven’t connected Planner yet, choose Connect Microsoft Planner…. This takes you to Integrations in your settings — connect it there, then come back to the schedule and click Import again.
- Choose your Planner connection, pick a plan in Import from Planner, and click Import.
Each Planner bucket becomes a summary task with its tasks nested underneath. Dates and progress carry over. You’ll see how many tasks and buckets were added. From there, link the tasks and set durations to turn the list into a CPM schedule.
The Planner connection is personal: it uses your own Microsoft 365 sign-in and only shows plans you can see.
Upload a Primavera P6 schedule (.xer)
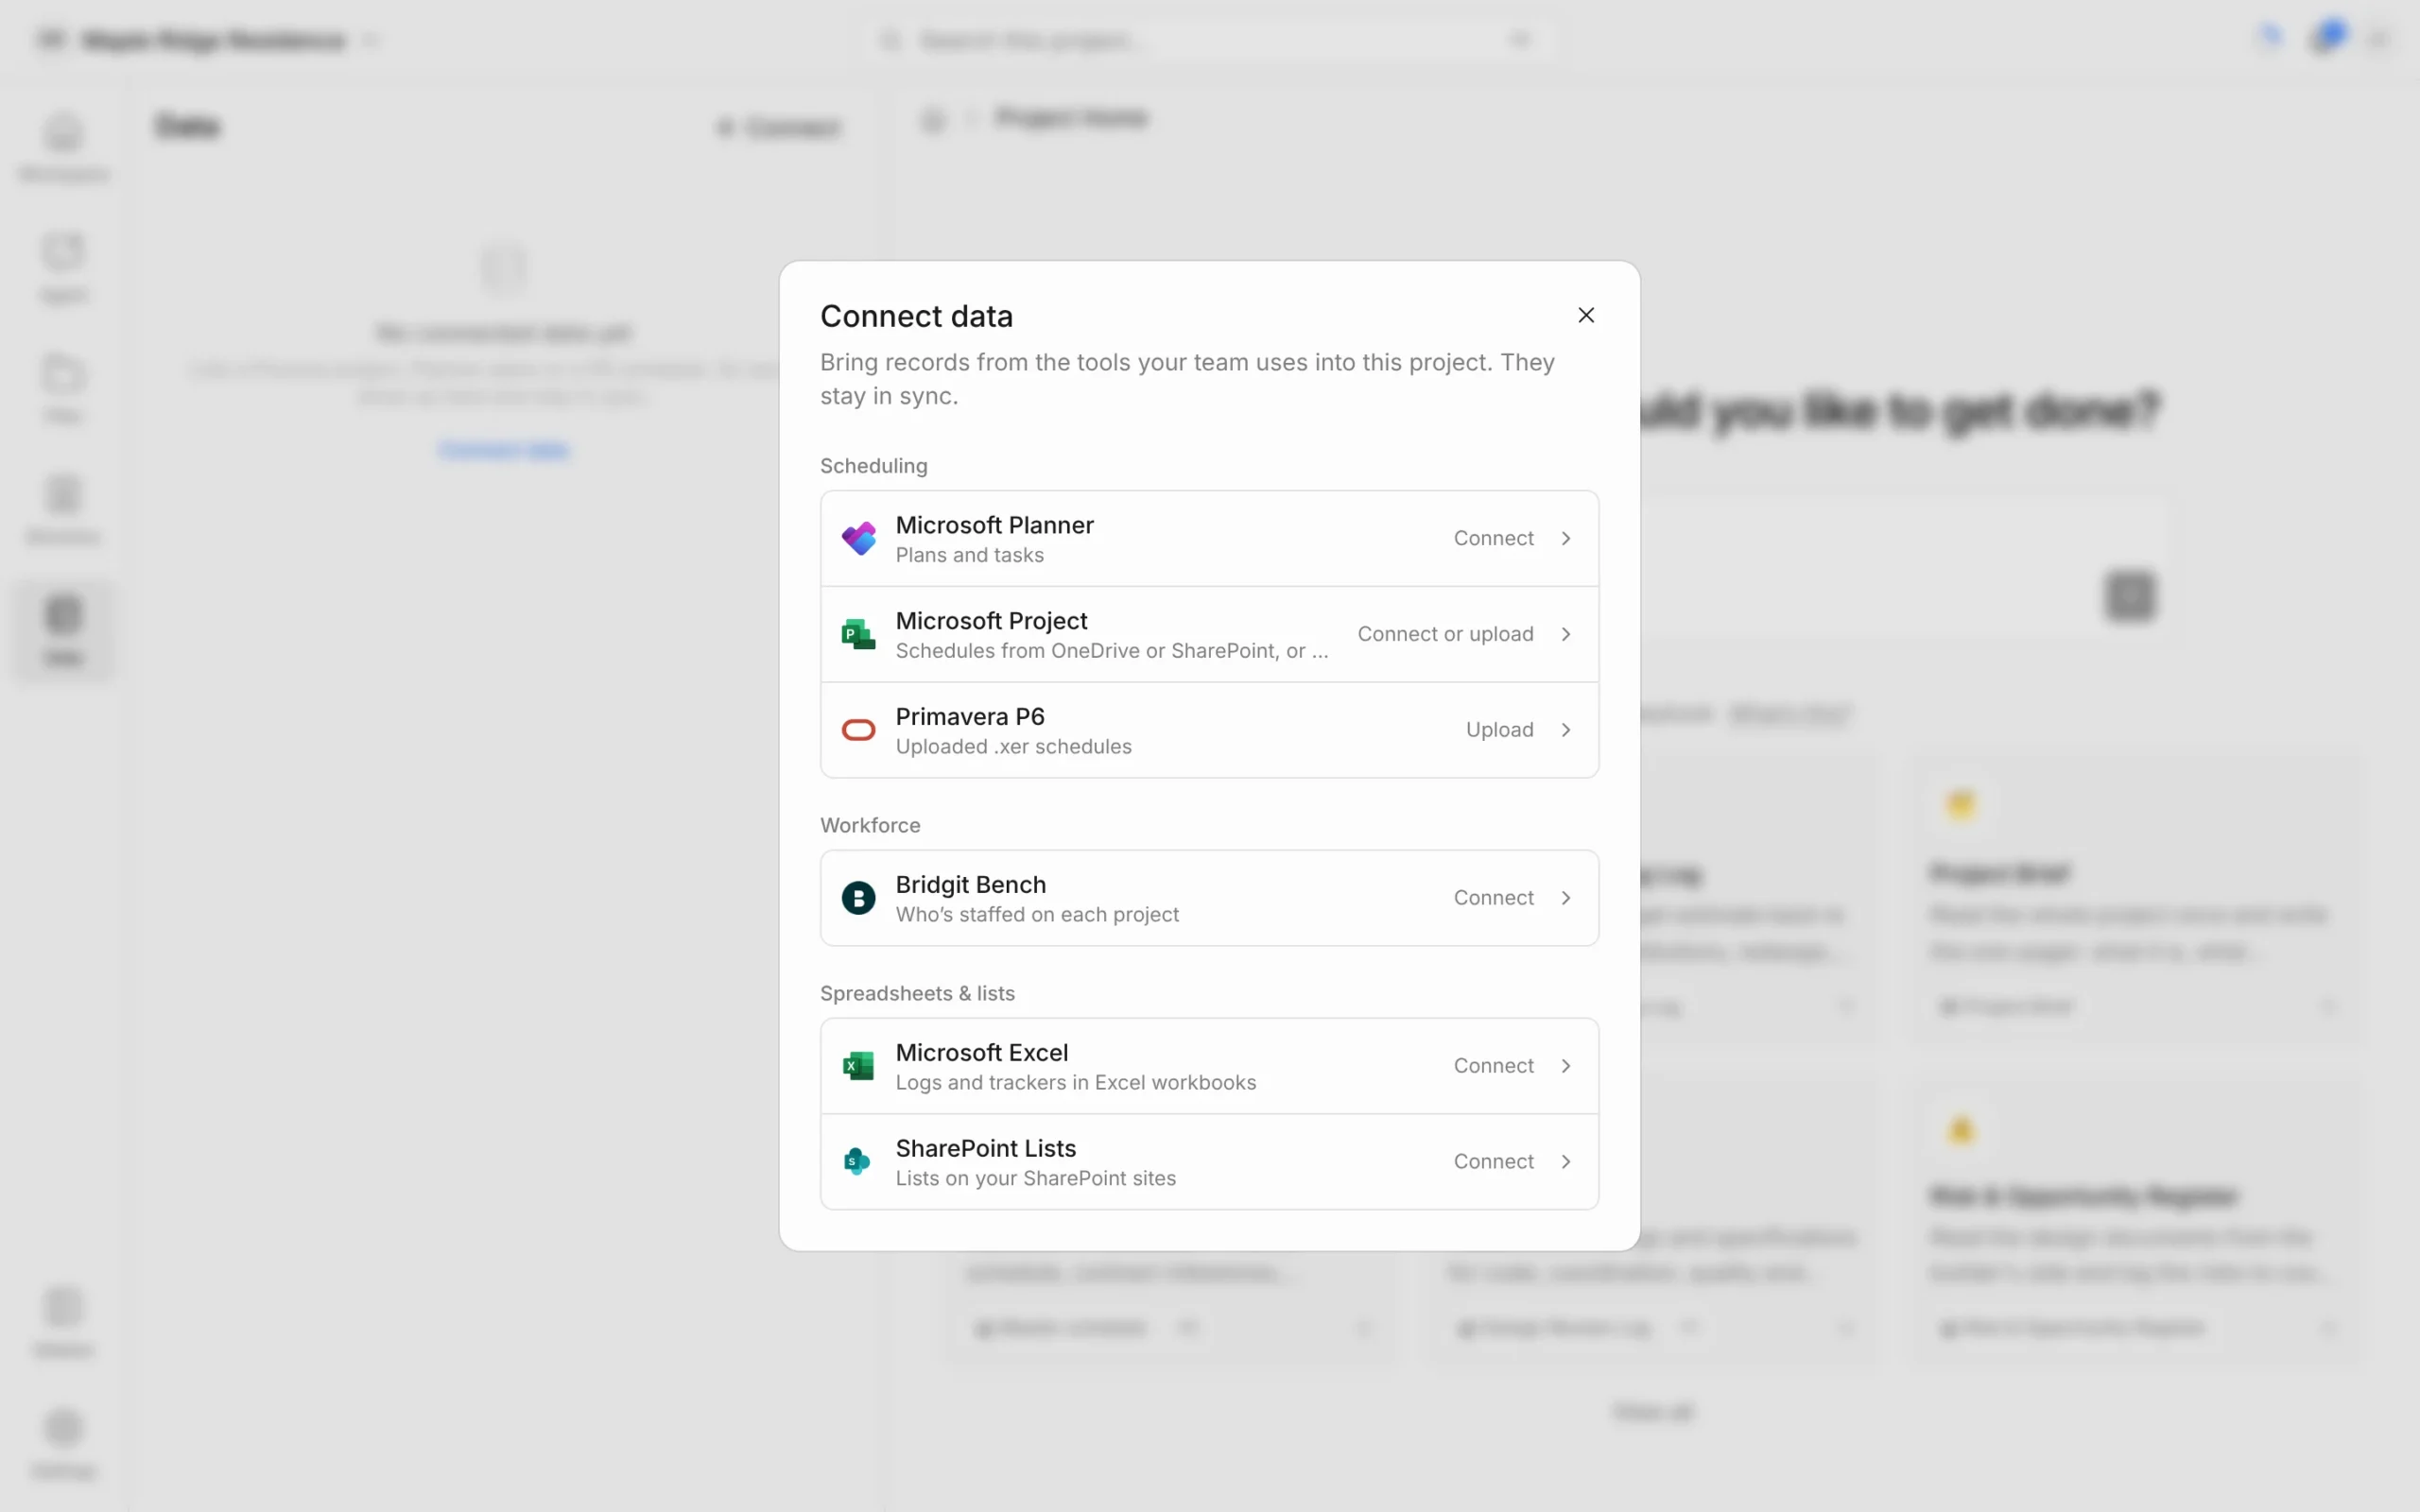
- In the left rail, click Data.
- Click Connect (or Connect data if nothing is linked yet).
- Under Scheduling, choose Primavera P6.
- Click Upload a .xer file and pick the export from your computer.
Export the .xer from P6 first. Primavera Cloud and Phoenix export .xer too. The upload brings in every activity under its WBS, original and remaining durations, start and finish, % complete, total float and the critical path, logic with lag, constraints, calendars and resources.
Add a Microsoft Project schedule (.mpp)
In Data → Connect, choose Microsoft Project. Then either:
- Upload a .mpp file saved on your computer or office server, or
- Sign in with Microsoft 365 and link .mpp files kept in OneDrive or SharePoint. Each sync re-reads the file, so when the scheduler saves a new version it shows up here.
Work with an uploaded schedule
- Each uploaded or linked schedule appears in the Data panel. Click it to open its activities as a table.
- Hover the schedule and use its menu to Upload new version after the next update, or Remove it. Removing deletes the file and its activities for everyone in the workspace.
- The agent can read it: “Which activities on the P6 schedule are critical over the next three weeks?” or “Compare the framing dates in the master schedule with our lookahead.”
These Data tab schedules are read-only in Framework — make changes in P6 or Project and upload or sync again.
Who can do this
Workspace admins and the project’s editors can connect data and upload schedules. Viewers can open what’s already linked. If you don’t see Connect, ask for the Editor role on the project.