Each construction project you work on should have its own project in Framework. This keeps documents, conversations, and AI memory organized and separate.
Step-by-Step
- From the projects list, click + New Project (or the floating + button on mobile).
- Enter a Project Name (required) — use something descriptive like “Downtown Office Tower” or “Highway 401 Bridge Rehabilitation.”
- Add a Description (optional) — include details like location, scope, timeline, or anything relevant.
- Click Create Project.
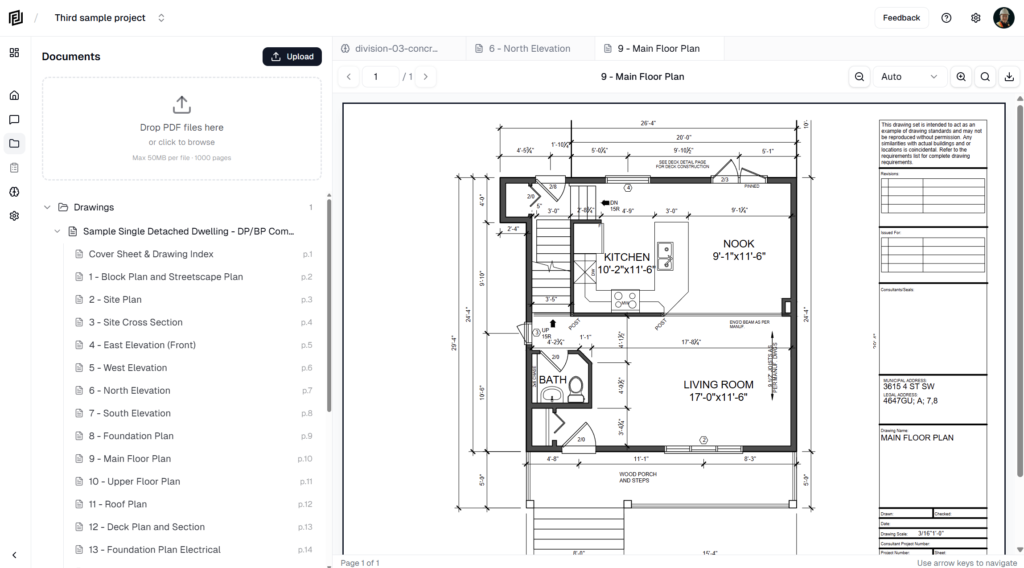
After creation, you’re automatically redirected into the new project’s workspace, ready to upload documents and start chatting.
Default Settings
New projects are created with sensible defaults:
- Supported formats — PDF, Word, Excel, AutoCAD (DWG, DXF)
- AI Model — Claude Sonnet 4 (latest)
You can modify these and add more details in Project Settings after creation.
Project Limits
If you’ve reached the project limit for your plan, the Create Project button will be disabled and a banner will appear explaining the limit. Options:
- Upgrade your plan to increase the project limit.
- Archive or delete an existing project to free up a slot.
What Happens After Creation
When you create a project, Framework automatically:
- Sets up the project workspace with all activity panels.
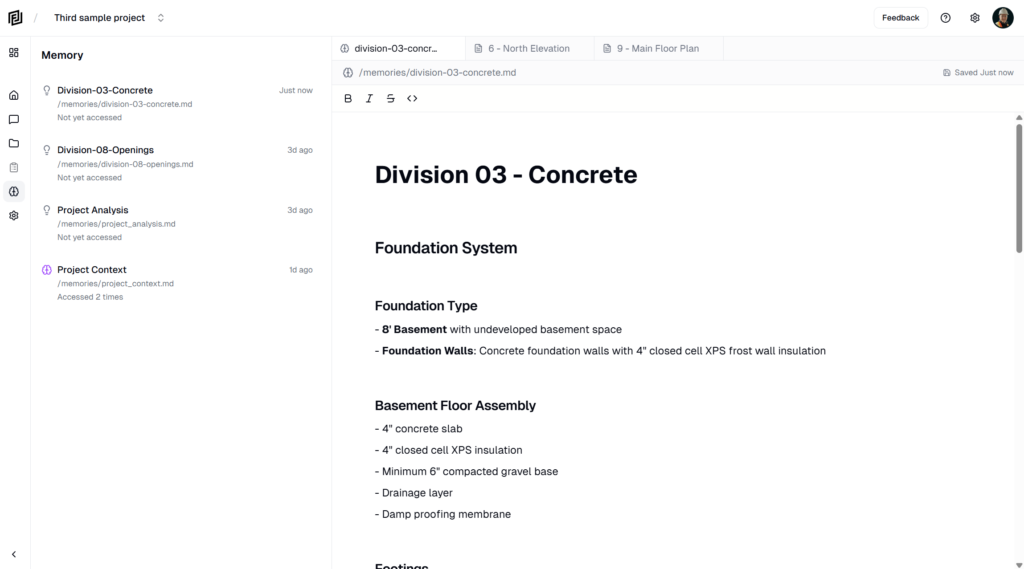
- Creates AI memory storage for the project.
- Generates a unique project email address (for future email-to-project features).
- Assigns you as the project owner.
Your next step is usually to upload your first documents.