Overview
Notes are your personal workspace for capturing ideas, meeting minutes, to-do lists, and anything else related to your project. Unlike memory files (which the AI creates automatically), notes are primarily created by you — though the AI can also create notes on your behalf when you ask it to.
Accessing Notes
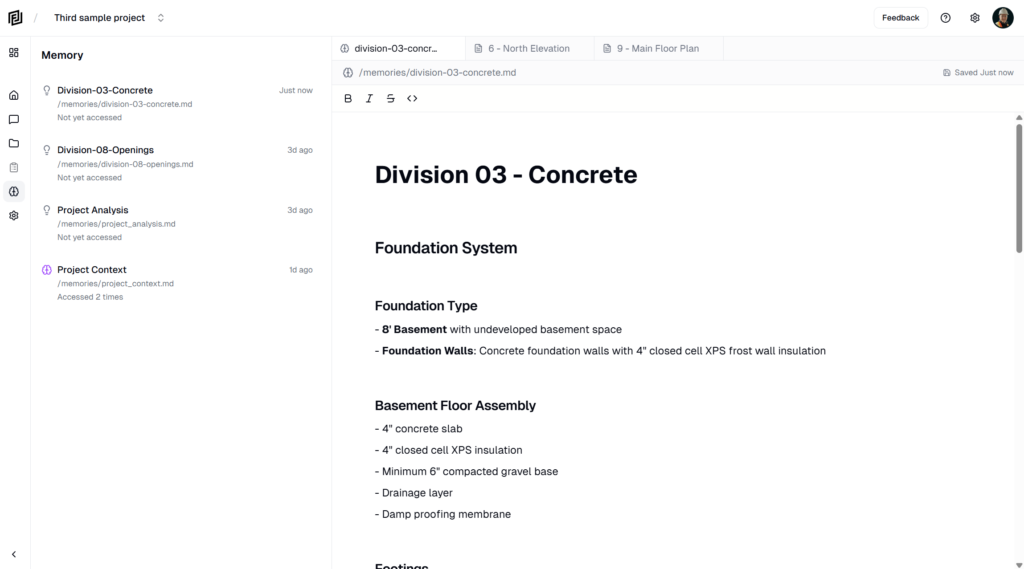
Click the Notes icon (document/file icon) in the activity bar on the left side of the workspace. The Notes sidebar opens, showing all notes for the current project.
Creating a New Note
There are two ways to create notes:
Method 1: From the Sidebar
- Open the Notes sidebar
- Click the + New Note button in the header
- A new note is created with an auto-generated title (e.g., “Note – Feb 11, 7:30 PM”)
- The note opens automatically in the main viewport
Method 2: Via the AI
In Act mode, you can ask the AI to create a note for you:
“Create a note summarizing the key requirements from the structural specs”The AI will use the Create Note tool to generate and save the note to your project.
The Note Editor
Notes open in a rich text editor in the main viewport. The editor supports:
- Headings — Multiple heading levels for structure
- Bold, italic, underline — Standard text formatting
- Bullet and numbered lists — Organized content
- Block quotes — Highlighted quotations or callouts
- Code blocks — For technical content
- Tables — Structured data
Auto-save: Notes save automatically as you type. You’ll never lose your work.
Organizing with Tags
Notes support a tagging system for easy organization and filtering.
Viewing Tags
Each note displays its tags below the title in the sidebar, shown as #tag-name labels. Notes without tags show “No tags” in light italic text.
Filtering by Tag
When your notes have tags, filter badges appear at the top of the sidebar:
- Click a tag badge to filter — only notes with that tag are shown
- Click multiple tags to narrow further
- Active filters are highlighted with a filled badge style
- Click ✕ Clear to remove all filters
Date Grouping
Notes are automatically organized by date in the sidebar:
- Today — Notes created or updated today
- Yesterday — Notes from yesterday
- This Week — Notes from the current week
- This Month — Notes from the current month
- Older — Notes from previous months
Each group shows a count and can be collapsed by clicking the group header. This makes it easy to find recent notes without scrolling through your entire collection.
Managing Notes
Opening a Note
Click any note in the sidebar to open it in the main viewport. The note opens in a new tab — you can have multiple notes open simultaneously.
Note Actions Menu
Hover over a note in the sidebar to reveal the three-dot menu (⋮):
| Action | Description |
|---|---|
| Open | Opens the note in the main viewport editor |
| Delete | Permanently deletes the note (with confirmation prompt) |
Deleting a Note
- Hover over the note in the sidebar
- Click the three-dot menu (⋮)
- Select Delete
- Confirm when prompted
Warning: Deleting a note is permanent and cannot be undone.
How the AI Uses Notes
The AI can interact with your notes in several ways:
- Create Note — Ask the AI to create a note, and it generates one with a title, content, and optional tags
- Edit Note — Ask the AI to update an existing note with new information
- List Notes — The AI can browse your notes to find relevant information
- Reference in chat — The AI can read notes for context when answering questions
Tip: Use notes to build up project summaries, track decisions, or create checklists. You can ask the AI to “create a note summarizing today’s document review” and it will generate a well-organized note automatically.
Common Use Cases
- Meeting notes — Record discussions and action items
- Document summaries — AI-generated summaries of key documents
- Checklists — Track items that need attention
- Decision logs — Record project decisions with rationale
- Quick references — Key specs, contact info, or important dates